Table of contents
Overview
The Home page is the default page that is displayed when you visit a website created using Campanula.
By updating the configuration file and creating the necessary Markdown files, you can create the Home page without writing any JavaScript code.
Here are the steps to create a Home page.
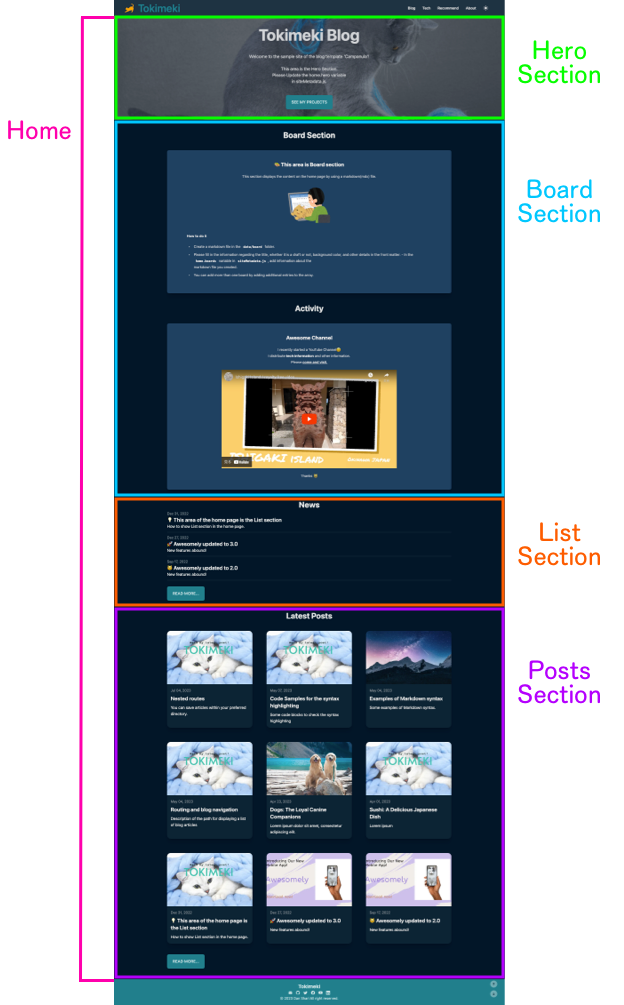
Currently, the Home page is composed of four sections, as shown in the above image.
Please edit the home variable in the data/siteMetadata.js following the instructions below and configure the necessary settings.
Other than the Posts Section, the rest of the sections are not mandatory, so you can start with a minimal and simple configuration.
Creating Hero Section
There are two display formats for the Hero section.
Type1
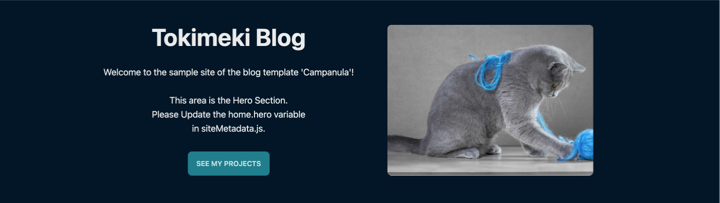
The design separates text and images.
Type2

The text is positioned in the middle of the image background.
Set up Hero Section
Edit the home/hero variable in the data/siteMetadata.js file.
home: {
  hero: {
    enable: true, // required (If false, display nothing)
    type: "1", // required (1 or 2)
    title: "Tokimeki Blog", // optional (If blank, title above is used)
    description:
      "Welcome to the sample site of the blog template 'Campanula'!\n\nThis area is the Hero Section.\nPlease Update the home.hero variable\nin siteMetadata.js.", // optional (If blank, description is used)
    button: {
      enable: true, // required (If false, display nothing)
      text: "See My Projects", // If enabled required
      href: "/blog/my-project", // If enabled required
    },
    // image: '/images/stock/hero_square.png', // optional
    image: "/images/stock/hero_rectangle.png", // optional
  },
},
- Set
enabletotrueto enable the Hero Section. Iffalse, nothing is displayed - Set
1or2the type of the display format intype. - Enter the title you want to display in the Hero Section in the
titlefield. If you don't need a title, leave it as''. - Enter the description you want to display in the Hero Section in the
descriptionfield. If you don't need a description, leave it as''. - You can set a button in the
Hero section. This button can be linked to blog posts or static pages within the website or external URLs. Setenabletotrueto enable the button. if enabled,textandhrefmust be specified. - Please enter the path to the image. This field is not mandatory, but for better appearance, it is recommended to set an image.
Creating Board Section
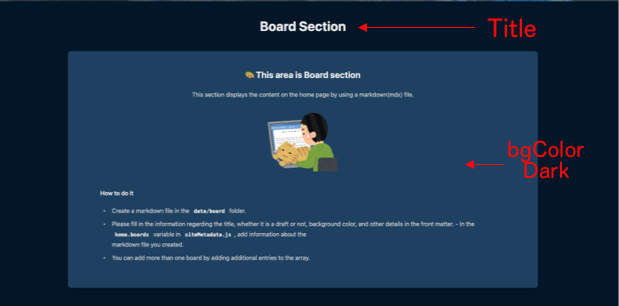
The Board Section displays content from Markdown files created for each desired theme, just like posting notices on a bulletin board.
Please follow the instructions below to configure the content to be displayed in the Board Section.
- Create a markdown file in the
data/boardfolder. - Please fill in the information regarding the title, whether it is a draft or not, background color, and other details in the front matter. See Frontmatter for the Board
- Edit the
home/boardsvariable in thedata/siteMetadata.jsfile. See Configure the Borad section
Frontmatter for the Board
Please edit the front matter of each Markdown file accordingly.
---
title: "Board Section" # optional (If blank, display nothing)
draft: false # required
bgColorLight: "#D6DAFF" # optional (If blank, display default)
bgColorDark: "#1F4061" # optional (If blank, display default)
---
- Enter the title you want to display in the top of Board Section in the
titlefield. If you don't need a title, leave it as''. - Set
drafttofalseto enable the Markdown file. Iftrue, nothing is displayed - You can set a background color for each Board. Please provide the background color in hexadecimal format for both light mode and dark mode. If you don't need to set a background color, leave it as
''. The default color will be displayed in that case.
Configure the Board section
Edit the home/boards variable in the data/siteMetadata.js file.
In the configuration file, write the filenames of the Markdown files in the order you want them to be displayed in the array.
If 'boards' array is empty, nothing is displayed.
home: {
  boards: [
    // This section displays the contents of the markdown(mdx) file. If blank, display nothing.
    {
      fileName: "board-2.mdx", // required (Please create an mdx file in the data/board directory. Please write the file name in this item.)
    },
    {
      fileName: "board-1.mdx", // required (Please create an mdx file in the data/board directory. Please write the file name in this item.)
    },
    {
      fileName: "board-3.mdx", // required (Please create an mdx file in the data/board directory. Please write the file name in this item.)
    },
  ],
},
Creating List Section
The configuration method for the List section has been summarized in another article.
Please take a look at:
💡 This area of the home page is the List section
Creating Posts Section
The Posts section displays the latest blog posts in descending order by date, with the specified number of posts as the upper limit.
Edit the home/latestPosts variable in the data/siteMetadata.js file.
home: {
  latestPosts: {
    maxCount: 9, // required
  },
},
- Enter the number of items you want to display in the
maxCountfield.
